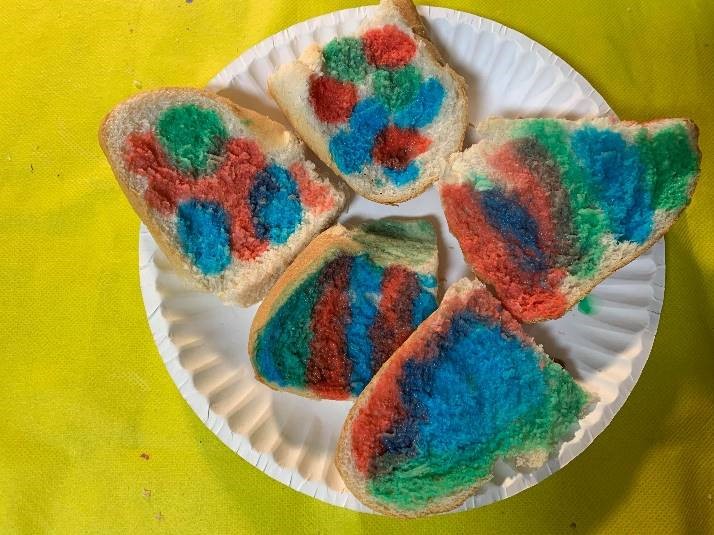
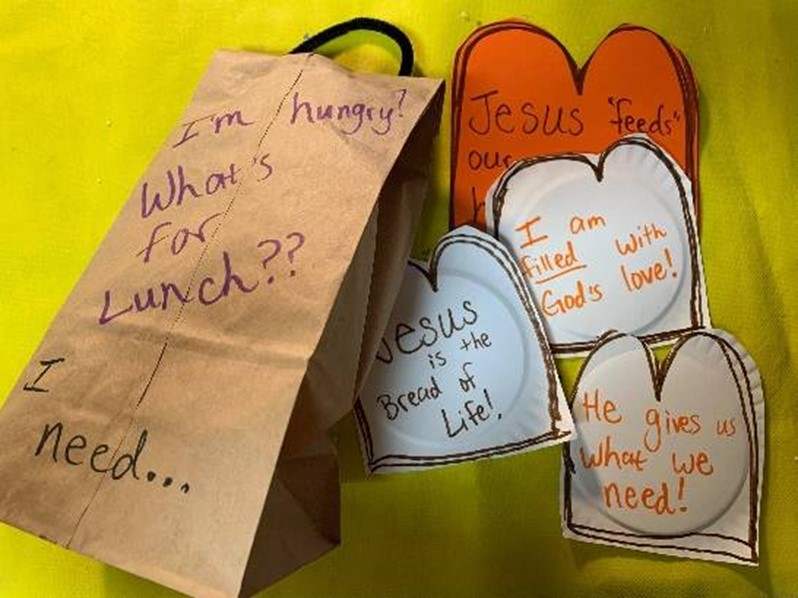
We see bread appear several times in the Bible…God gave the Israelites manna in the wilderness. Christ used loaves and fish to feed crowds. Most significantly, the savior gave His body for us on the cross, and calls us to remember that with the bread of Communion. What does it mean that Jesus calls Himself the bread of life? Just as we are physically fed by food, we recognize that we need spiritual nourishment. We obtain that through prayer, Scripture study, and remaining mindful of God’s presence. These crafts emphasize bread as it represents Jesus. A “brown bag of bread” provides reminder “slices” of the power of Jesus. A “Carb Art” edible activity allows students to decorate and then enjoy a crafted snack!
Bible Verses or Craft Captions to Consider… (Main Text: John 6:24-35)
- Do not work for the food that perishes, but for the food that endures to eternal life, which the Son of Man will give to you. For on him God the Father has set his seal.” -John 6:27
- Jesus said to them, “I am the bread of life; whoever comes to me shall not hunger, and whoever believes in me shall never thirst. -John 6:35
- I’m hungry…what’s for lunch?
- Jesus Christ…the true bread of LIFE!
- Be nourished in faith…Jesus gives us what we need!
- Jesus feeds our souls!
- I am FULL of God’s love!
More Teaching Ideas:
- Watch the vide of this children’s sermon and related craft ideas
- Compare another John 6:24-35 Sunday School lesson or Bible Lesson on the Bread of Life
- Compare this I AM the Bread of Life lesson plan and printable Bread of Life crafts
Craft one: “Brown Bag of Bread”
You will need:
- Construction paper or card stock
- Paper bags (or baskets or boxes)
- Small paper plates (optional)
- Markers or crayons
- Scissors
- Glue or tape
- Pipe cleaner or string
Procedure:
- Cut paper plates, paper, or cardstock into bread slice shapes.
- On each “slice”, write a method of being nourished spiritually by Jesus.
- Decorate a paper bag, small box, or basket with captions and additional decorations (stickers, etc.) if desired.
- Add a string of pipe cleaner to display the bag. Place the “bread” inside.
Craft Two: “Carb Art” Painted Bread Snack
You will need:
- Paper Plates
- Markers/crayons
- Paint brush
- Food coloring
- Milk
- Cups or glasses
- Captions/verses
- Bread (white, toast recommended)
Procedure:
1. Select several slices of bread for each student: plain white bread works best. Thicker or heartier bread can be used, but “holey” types like challah are not recommended. Toasting the bread can be helpful to soak up the color and prevent it from becoming soggy.
2. Option: Use markers (permanent are best) to decorate the bread with designs or letters. This will render it NOT safe to eat.
3. Choose a few colors from the food coloring, and mix one in each of several cups of milk (any kind of milk will work).
4. Use the brush to “paint” the milk onto the bread in designs.
5. If desired, add a small bit of sugar or sprinkles for extra fun. Gobble up the painted bread and enjoy!


your website is very wonderful. i love it so much. it gives me ideas of what i teach my children bible club member.
see you face to face in heaven.
thank you.
Ruth